


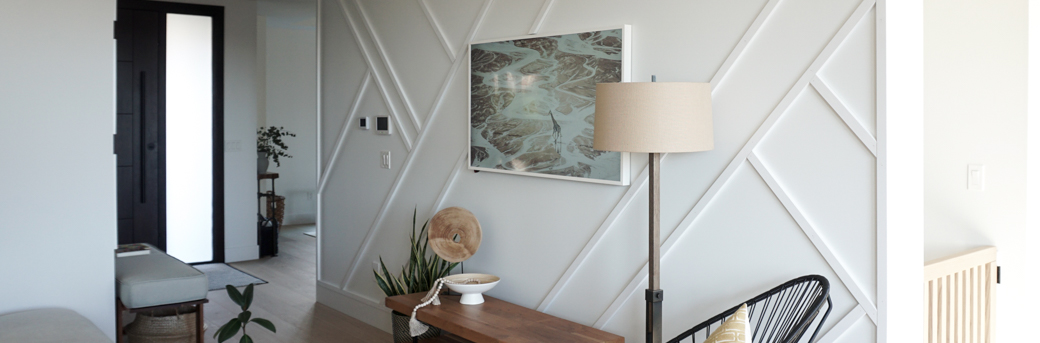
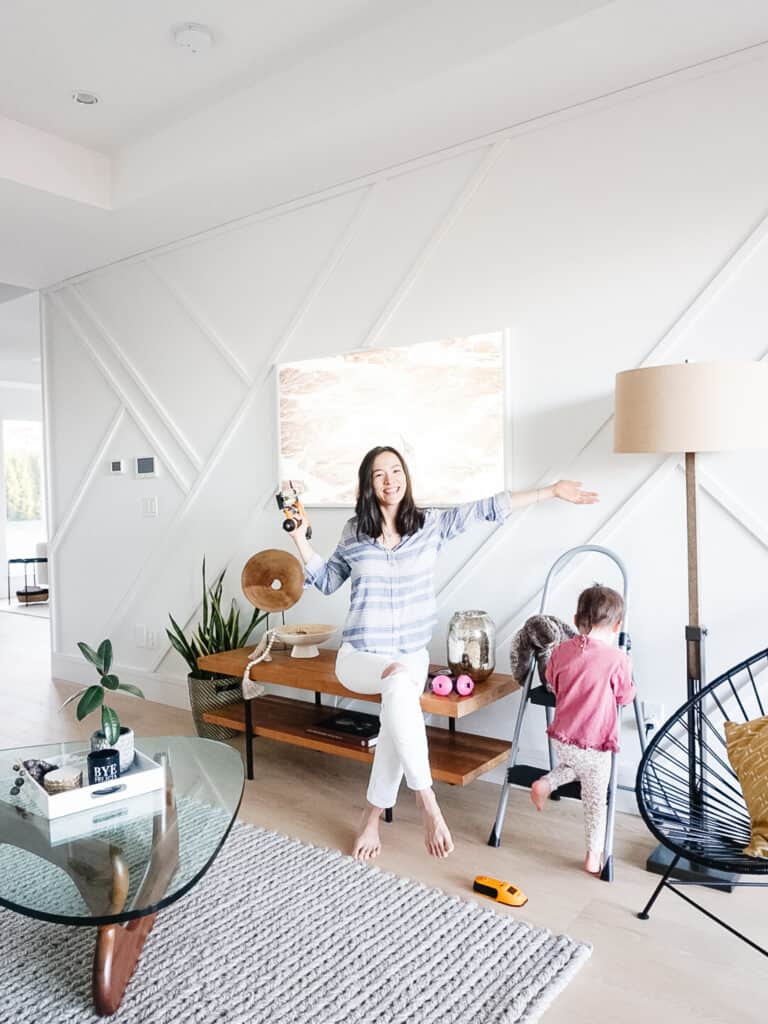
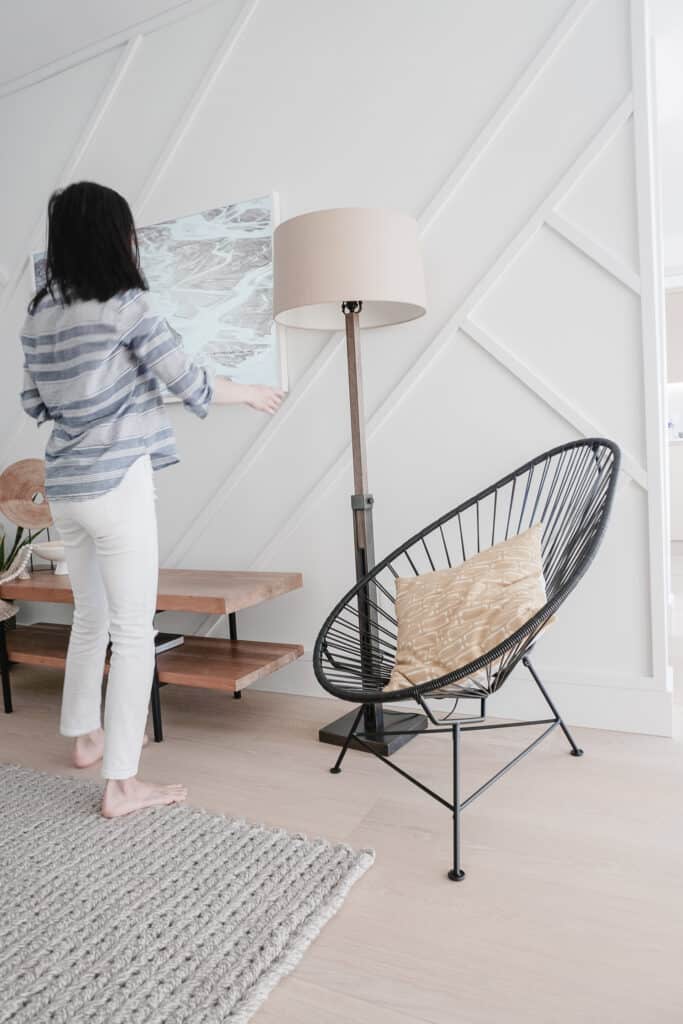

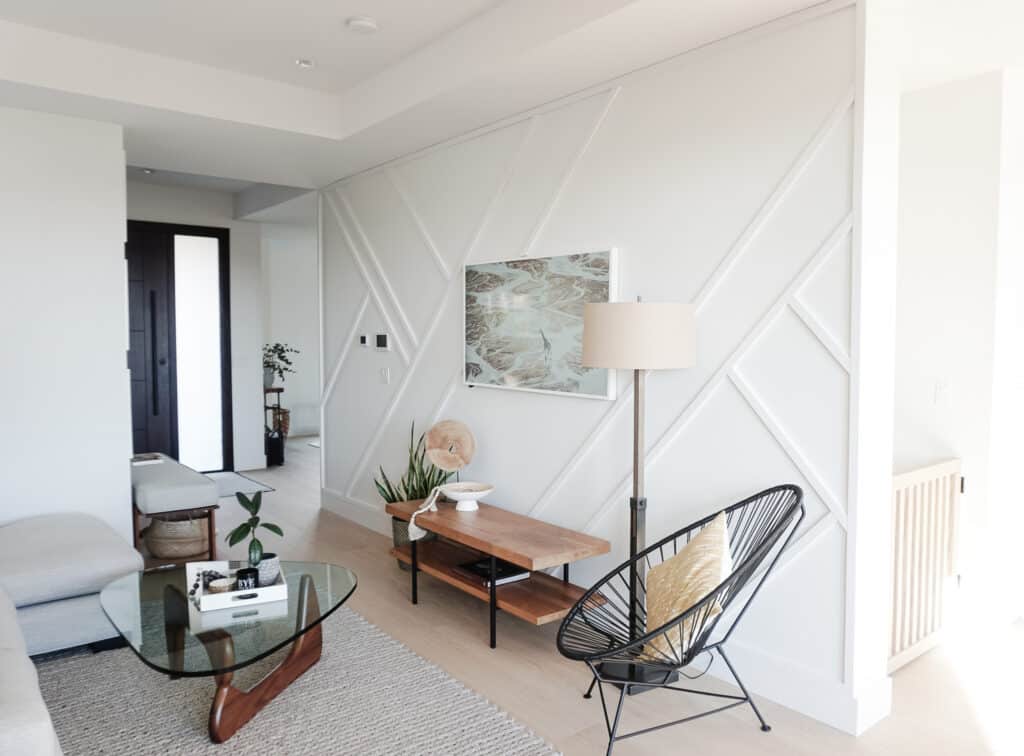

Welcome to the most challenging DIY project I’ve ever done in my life to date: peel and stick

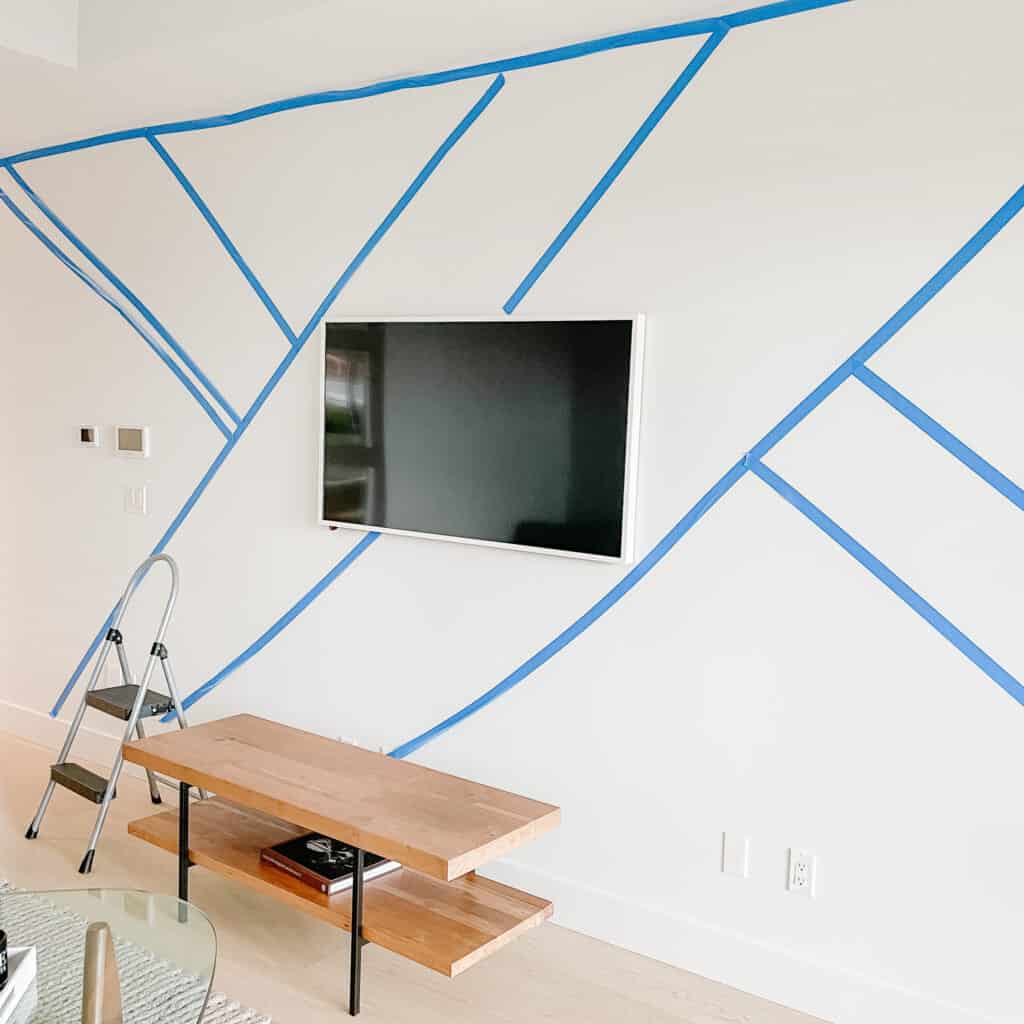
By now we all know that I’m obsessed with adding details to walls. Panel moulding, shiplap, wallpa

You're mentally ready for spring, but is your garden?! It totally needs something more. Perhaps a cu
Comments
-
-
Samantha
Thank you SO much! It’s very true – of anyone – I learned this lesson from the best!
-
-
GAMPIE
I think you should mention your helper. You definitely nailed this project can’t wait to come there and see it in person.
Xoxo-
Samantha
My little helper played a critical role in this, you’re right I needed to give her more credit. Hehe. Can’t wait for you to come see it too. Hopefully really soon. XOXO
-
-
Erin
This is insane!!! I think this is my favorite DIY you’ve done thus far. I had never even heard of a board and batten before but now all of a sudden I 100% need one in my house???
-
Samantha
You need it for sure! It’s such an easy way to elevate your walls but keeping simplicity. I am thinking of more walls this is going down on (hint: it’s all of them).
-
-
Karen
Samantha you did an outstanding job of that wall! That is quite the venture you took on and it looks absolutely amazing! Now settle back and toast yourself to a job well done! Cheers🍷xo
-
Samantha
Thank you so much Auntie!!! I’ve actually started watching more TV just so I can stare at the beautiful creation. Thank you for your support! Can’t wait to cheers you in person. XOXO
-

Sherri
Well done Samantha. Your wall looks amazing.
Clearly there is nothing you can’t achieve once you set your mind to it.
Xo